Monthly Archives: November 2013

Yet more wiring !

Isolation Switches

Isolation Switches

It seems at times that the amount of wiring in the 90 just keeps going up and up and up ! This last weekend I’ve had the dash apart again, hopefully for the last time before it ships…

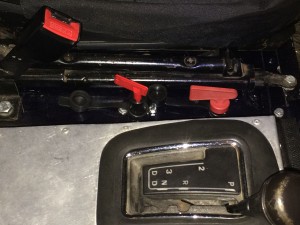
I wanted to add a couple of isolation switches both for safety and also to ensure that the batteries will make it to the other side without being discharged. I wanted to add an isolator for each battery so they could be isolated individually. If nothing else this means I can leave the auxiliary battery disconnected so if the main battery gets left on during shipping we can jump start it from the auxiliary battery. Positioning the switches so they are accessible from both seats and at the same time reduce the risk of them being accidentally switched off took some thinking about and in the end we settles for a position next to the passenger seat. The main battery switch is an FIA type which has the extra contacts that I’ve wired in so that the switch will also kill the engine if turned off with the engine running.

iPad mount and map light

iPad mount and map light

I have rewired the switches for the spotlights and the rear work lights – the rear work lights were connected to a Carling switch on the dash and the spotlights to the Land Rover spotlight switch. This was OK but didn’t give too many options for the spotlights and, as they are LEDs and can be left on for long periods without draining the battery, I wanted a switch that would allow them to be turned off, on only with main beam and on independently. To achieve this I changed them around using a Carling switch for the spots and the Land Rover dash switch for the rear working lights.

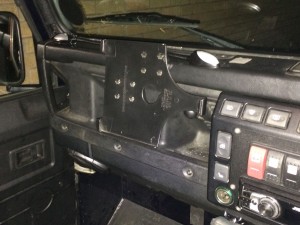
With the Dash apart I changed the iPad RAM mount from the seat mounting type to a universal mount on the dash. The seat mount is OK but tends to wobble around all over the place when you’re crossing rough ground, so much so you have to lock the rotation on the iPad. The dash mount takes up less room and will stop the annoying wobbling !
IMG_0421

Australian CB Radio

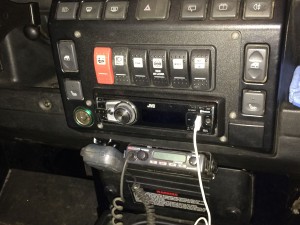
I also added an LED interior light for the passenger area that works in addition to the factory interior lights and fitted the mount for the UHF radio (Australian CB radio), connected up the power lead for the radio and the aerial lead. I also got around to fitting the map light to the top of the dash. All in all a busy few days and lots of jobs “ticked off” the list in the process 🙂

 

Front end redesign

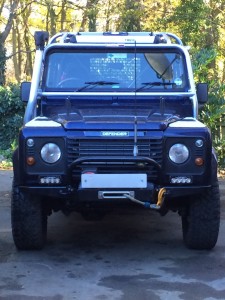
IMG_0416For Australia we felt we were a bit short of frontal protection, hitting a kangaroo at some point in our trip is pretty much a certainty and the radiator is a bit vulnerable. We didn’t want to go too overboard  but felt that some extra protection would be worthwhile. We settled on adding a simple A frame to the top of the bumper that sits around half way across the exposed radiator area. With a bit of luck if/when we get a roo strike it will reduce the chance of any serious damage to the vehicle.

With hindsight we probably should have got a winch bumper with an A bar in the first place but didn’t really like any of those available. I had to call on the services of Patrick at Maddison 4×4 to bend up some CDS to approximately the right shape and I then made up some spreader/mounting plates that bolt to the top of the bumper using the existing bumper mounting bolts and a couple of additional bolts at the front.

I added an aerial mount to the A bar while I was at it but it wasn’t until after it was welded, painted and fitted that Pam pointed out we should have added provision for a sand flag mount ! Sand flags are a good idea regardless but they’re expected to be mandatory on the Simpson Desert routes for 2014. I might add a mount to it and repaint… or we might just end up using some tie wraps and duct tape !

While I had the drill out I also drilled the mounting holes for the front LED spotlight bars to mount to and connected them up to the wiring loom I’d already added.

Mounted and covered !

It’s been a couple of weeks since the last update and with about 5 weeks to go before the shipping date it’s been a week of checking and re-checking what needs doing still and that we are still on track both in time and budget. Fortunately, so far, it’s looking pretty good, let’s hope it stays that way 🙂

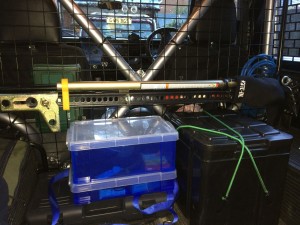
Hi-Lift Jack in position The Hi-Lift mount is done, painted and fitted, I got some M10 ring nuts as an impulse buy while perusing an online nut and bolt shop (as you do) and it turns out they are perfect as a way of securing the Hi-Lift to the mount and providing extra tie down points. With the design I eventually came up with the Jack is secured with a single one of these nuts and is held securely with no rattling. A second nut can be added to the foot for additional security but isn’t really needed.

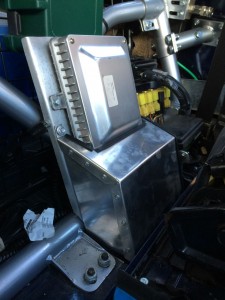
ECU wiring coverAnother in the long list of jobs I’ve been meaning to get around to was to make a cover for the ECU, or at least a cover for the wiring going into the ECU. Being behind the seat we’ll probably end up stuffing clothes, water, snacks and who knows what else behind the seats and there was always a danger that this would stress a wire or separate a plug so it needed to be a bit more robust.

in between rain showers and F1 coverage I ended up making 3 different covers, the first out of cardboard to use as a template, the second out of aluminium based on the template and the third because the first two didn’t quite fit right ! Third time lucky though and I’m quite pleased with the result, not too intrusive and covers all the important bits while allowing access to the fuse box and relays.

One other thing we’ve “ticked off” this week is the MOT test, the MOT is/was due to expire in March 2014 which isn’t ideal so we’ve taken it for an MOT 5 months early so it will be fully UK road legal throughout the trip (one of the requirements for use in Australia as a foreign vehicle). As expected (although always a relief !) it passed without any problems/advisories.