Fuel and Battery Status Display

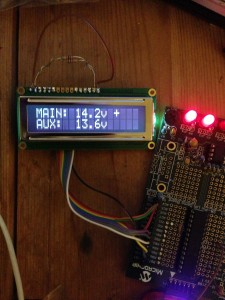
Battery monitorThe dual battery system has been missing a couple of things since I first installed it and I’ve spent a few evenings this week playing with a PIC chip and an LCD display. The aim is to have some way of checking the charge level of both batteries and to control the automatic charging of the secondary battery when the main battery is at a reasonable voltage. It will always have the manual overrides of either permanently connecting the aux battery (to jump start the main) or having it disconnected if I want to put all the charge into the main.

As the PIC chip I’ve chosen has plenty of spare capacity I also added provision for it to display the fuel level in each fuel tank too, alternating every 10 seconds between the fuel levels and the battery levels/voltage.

I’m currently using a 16×2 character display but the finished version will be 2×8 characters, allowing it to take up less dashboard space. The programming is just about done apart from calibrating the fuel levels against the two sender units, just need to build the design into something a bit smaller now !

The chip I’m using has another 4 spare analogue inputs so I might add some additional warning monitoring into it yet. Maybe gearbox temperature, fuel pressure perhaps, turbo boost pressure, I’m fitting a dedicated monitoring system so I’ll see what that’s missing and maybe add them into this chip/display. It’s always better to know when something’s starting to go wrong rather than a complete failure being the first sign of trouble.

Fuel system completed ?

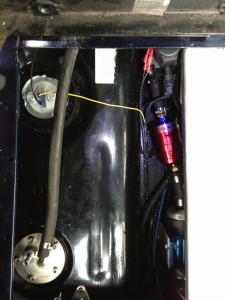
Switchover valve, pump and filterFinished the fuel system this weekend, well it might get a few more tweaks yet but it’s all working now at least. I may well end up changing the fuel pump for a higher throughput version and having a pre-filter for each tank rather than a single pre-filter at some point.

The picture on the left shows the under seat fuel tank and to the right of it the changeover valve (top right), filter and pump.

The pipe work was all fitted yesterday and today I made the mounting brackets for the valve and pump and wired it all up. I had to cut into the chassis loom to break the feed to the fuel gauge and wire it through the valve and the fuel pump wires needed extending as the fuel pump is now further forward than it was.

The extra fitting on the pickup plate is for the breather pipe and valve to be connected to as we’re not using a fuel cap with a breather.

To put some fuel into the auxiliary tank and do a basic leak test I decided to disconnect the return pipe from the changeover valve and connect it to the vent connector on the top of the tank. That way the pump would pump from the main (rear) tank, through the engine and into the auxiliary tank. What I hadn’t thought about was that pumping it in through the vent meant there was no where for the air to go… The tank and the filler pipework was all nicely pressurised and when I took the filler cap off it went with a loud pop 🙂 Not sure what pressure it had got up to but the metal tank had expanded ! Fortunately no harm done and, on the plus side, I know now that the custom pipework I made up for the filler is all air tight.

The changeover valve works well, changing the fuel gauge and the fuel pump/return simultaneously, controlled by a switch on the dash. With the engine running you can switch from one tank to the other without the engine missing a beat. The sender on the auxiliary tank seems to match the fuel gauge too giving a reasonably accurate picture of the fuel level.

More fuel capacity

Under seat fuel tank and guard finally fitted

Under seat fuel tank and guard finally fitted

The next stage of adding more fuel capacity is well under way now. In total we should end up with approximately 145 litres, around 32 gallons.

Now the ECU and associated wiring is out from underneath the driver’s seat the next step was to remove the under seat box. That in itself was pretty straight forward as it’s only held in by pop rivets, albeit around 30 of them ! Once they were all drilled out the box itself was easy to remove. I’d not realised until I removed it that the box also fills part of the seat box aperture so I needed to make an aluminium filler plate to close the gap. Fortunately I had some 2mm plate in the garage that was ideal for the job and it’s all closed up now and relatively water tight with the removable cover clipped in place.

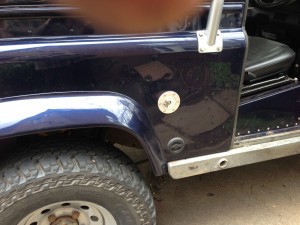
New filler cap... and my thumb... :)

New filler cap… and my thumb… 🙂

The fuel pump was also mounted on the side of the ECU box so I had to make a bracket that attaches the fuel pump to the chassis. One immediate effect of that was that the fuel pump is a LOT quieter now it’s not bolted to a box that amplifies the sound.

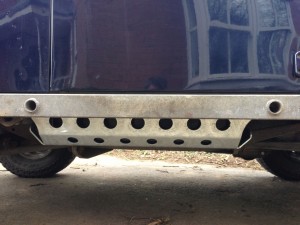
Getting the fuel tank, the fuel tank guard and the sill bars all fitted at the same time took a lot of work. The tank guard mounting brackets are designed to connect to the same mounting points as the sill guards. This meant that the tank guard brackets all needed to be modified so they could all exist together without getting in each other’s way. the tank guard mounting bracket also seemed to be the wrong size to match up with the body so that had to be cut and welded. All in all just getting the tank guard fitted at the same time as the sill guard took the best part of two days work.

Under seat fuel filler pipe

Under seat fuel filler pipe

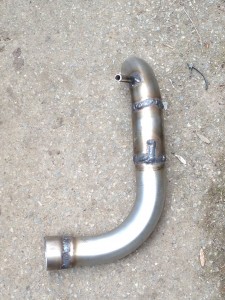
I then spent a day manufacturing the filler pipe that will allow the new tank to be filled using an aero style filler on the side of the back body. Hopefully I’ve got the angles and venting right so it’ll be easy to fill, nothing worse than a tank that has to be filled slowly or with the pump nozzle at strange angles to avoid the pump cutting out all the time.

The filler cap more or less had to be mounted where it is to get enough drop on the tank and be able to fit the pipework in, I’d have liked to get it aligned with the old LPG filler, in fact with hindsight I wish I’d mounted the LPG filler higher so I could have replaced it with the new one.

The pipe is made of 50mm stainless pipe and bends, cut and welded to fit. Hopefully the welds will be diesel tight, never easy to do with a MIG welder but I’m pretty confident I got it right… I’ll find out for sure when I fill the tank !

The next job is to re-plumb the fuel pump and pipework so it can work from either tank as well as having the ability, with a small amount of re-plumbing, to transfer fuel from one tank to the other.

Proper 4×4 now !

We finally had a bit of sunshine today, such a contrast to our weekend away in freezing temperatures !

Anyway, we got the last few bits and pieces we needed from Ashcrofts to complete the front axle conversion so I spent the day stripping the front axle and fitting the front ARB locker and the Ashcroft shafts, CVs and modified stub axles. So, with ARB locking diffs front and rear we have guaranteed 4 wheel drive with the ability to lock both axles as well as the centre diff.

The only bit I was missing were the two circlips and the shims that hold and adjust the end float on the CVs. The drive flanges used to have them in the same box but that was 5 years ago and since then they’ve been to Australia and back and hauled around the UK to a number of challenge events. Somewhere along the way the circlips went AWOL.

As a temporary solution I borrowed the ones off my challenge motor but I’ll need them back for the trial next weekend !

We survived

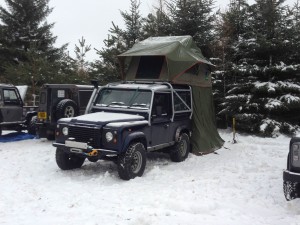
IMG_0296That has to be the coldest camping trip I’ve ever been on. The snow drifts around Duns were deep enough to stop pretty much any vehicle and some of the roads were closed throughout the weekend, about 800 yards up the road from the camping field in fact the road was closed due to drifts but the local snow ploughs kept the road past the camping field to Abbey St Bathans open.

The camping field itself had around 10-12 inches of snow but much of it had been compacted by vehicles so we were camping on top of the compacted snow and by Friday night there wasn’t much in the way of fresh snow, just the gale force winds and freezing temperatures causing what snow there was to drift.

The night section had to be abandoned due to 15 foot snow drifts on the course that had been laid out, not even the quads could get around the course.

Muddy Truckers CampingAnyway, apart form the constant zero and sub zero temperatures and wind chill down to -10 degrees C we and the camping gear coped pretty well. We slept well on both nights and were warm enough – we were both using 2 season sleeping bags with the duvet over the top of us and a hot water bottle each inside the sleeping bags.

The combination of compacted snow and a plastic ground sheet made life both interesting and precarious in the lower tent. Every footstep had to be made carefully in case the ground sheet slipped from under you on the ice below. We’re hoping that’s not something we’ll need to worry about in Australia !

Fortunately we took the Volcano kettle with us and plenty of firewood as the gas stove was a waste of time due to the cold temperatures. It did work, just took ages. The volcano was by far the quickest method to boil up some water and has probably reestablished itself as something we may take with us if space allows. As well as supplying us with hot drinks and pot noodles we also used it to fill the hot water bottles 🙂

Ready for the snow… I think…

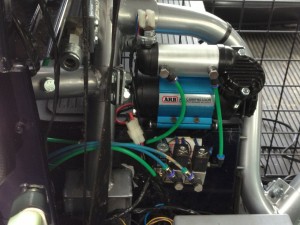
ARB compressor and airline connectorThe last few days have been busy finishing off a number of jobs in final preparation for the trip to Scotland for the Muddy Truckers Trophy, the weather forecast hasn’t improved any… if anything it’s got worse, it’ll be a cold one that’s for certain.

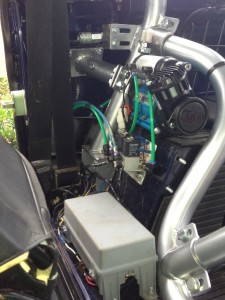
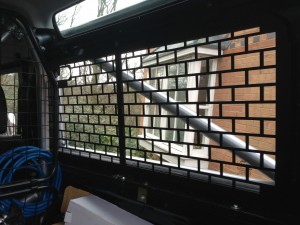
Anyway, got the internal rear window guards all fitted in the back and the rear work lights wired up. The auxilliary fuse box is completely wired back in and providing power for everything it needs to, including the fridge although that may not actually be a necessity for this trip given the forecast temperatures !

Auxilliary fuse boxThe ARBs came back from Crown Diffs so I fitted the rear one together with the spare Ashcroft half shafts. I’ve had those shafts since 2008 when they formed part of the spares kit we took to Australia. They were never used so it makes sense to upgrade the 90 axles with Ashcroft shafts and CVs. The front axle will have to wait until after the Muddy Truckers though as we’re missing a couple of bits.

I plumbed in the ARB compressor, running the pipework for both front and rear diffs, the winch free spool and an airline connector on each side of the vehicle for blowing up tyres etc…

Window guards

Other than packing some tools and the rest of our camping gear, clotting, food, water etc… we’re about ready to go. The pile of bits in the dining room is definitely diminishing 🙂

Back on the roof !

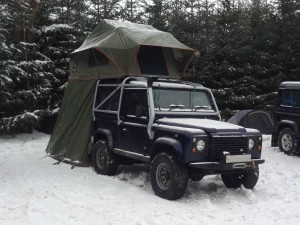
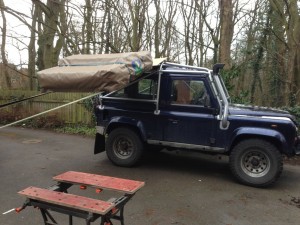
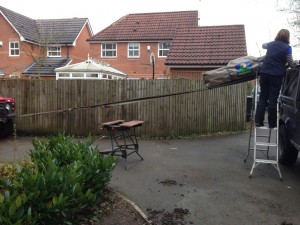
Roof tent mountingWe re-fitted the roof tent today after it’s winter break. It’s actually barely above freezing during the day at the moment but we’ll be camping in it at the Muddy Truckers Trophy so the sooner it’s back on, the better. There’s snow forecast in the run up to the event, fingers crossed that changes !

As with getting the tent off the roof in the first place I decided to use the strap and winch ramp technique. With a long strap from the roll cage to the end of the bumper on my challenge motor and a second strap from the cage to the winch (allowing that strap length to be “adjusted”) we placed the roof tent on the trusty Black and Decker work bench then drove the challenge motor backwards. As the straps tightened the roof tent was lifted off the work bench and then it’s just a case of pushing the tent up the ramp… carefully !

Roof tent mounting 2For once refitting was the reverse of removal and all went smoothly. We mounted the tent a lot further forward this time to see how it would work, time will tell.

With the roof tent on I fitted and wired up a couple of LED rear work lights as we’re almost certain to be needing them in Scotland and no doubt will end up setting up in the dark on at least one night.

Escape hatch and spare wheel carrier

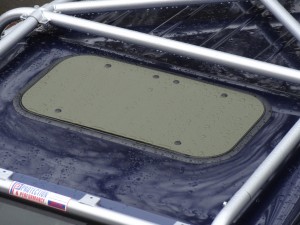
Escape hatch fittedWe’ve never been completely happy with the glass sunroof on the 90. Apart from the fact it leaks (don’t they all !) we probably don’t want a sun roof in for Australia. As well as the obvious problems of heat there’s also the fact that it’s quite vulnerable, especially when Pam is doing her roof tent monkey act. A number of times she’s stepped on the sun roof, albeit only lightly, but inevitably one day it’s going to shatter.

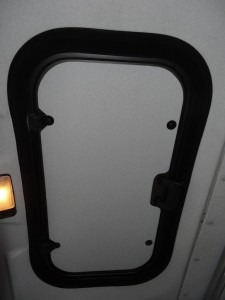
Interior view of escape hatchThe solution was to buy the military version of the sun roof that was fitted to military Defenders and termed an escape hatch. Essentially this is identical to a normal sunroof and fits in exactly the same way but the glass panel is replaced with a substantial aluminium panel. Being military the outside is painted in matt green but that will get sorted when the weather warms up a bit. The aluminium panel also lifts out completely if required, allowing you to exit the vehicle that way or access the roof.

It only took an hour to get the old sunroof out and the new escape hatch in, it then rained and, fortunately no leaks, even with the hose pipe on it.

Another job completed today was to replace the factory spare wheel carrier with a Mantec one. This will transfer most of the weight of the spare wheel down to the chassis rather than relying on the door and door hinges, hopefully preventing the door from disintegrating on the Australian washboard road surfaces.

Roll cage finished at last :)

Spent a bit of time tinkering with the electrics, tidying up a few bits and pieces and starting to map out the circuit diagram for the aux fuse box. The aux fuse box has sort of evolved over time as each new circuit was added and I ended up with no real idea which fuse was now used for what. I now have a full circuit diagram that will sit in the top of the fuse box for reference and also allow me to wire it back up again correctly !

The side windows on the 90 have rattled pretty much since we got it and have never actually sealed properly from what I can remember. We also want to fit internal window guards at some point and all the available ones we like are designed to fit standard Land Rover pattern windows, which the ones fitted aren’t. The upshot of this is that we’ve bought a pair of new windows from Masai which are pretty much OEM spec and “guaranteed” not to rattle so we can get rid of the bits of card/cloth/paper that have been pushed into the joints in an attempt to stop it rattling.

The first problem with changing the windows is the fact that the roll cage is in the way so replacing the windows first involves removing the whole of the rear half of the roll cage. When we fitted the cage we left four bolts out (two on each side) because to drill the holes meant marking them then taking the rear of the cage off again. So, as well as replacing the windows now was the time to finally finish off the cage installation !

It took pretty much the whole day to do the job as, as it turns out, not only did the old windows not use OEM catches they were also a different shape ! This meant quite a lot of time was spent cutting and filing the existing opening out to make it big enough for the new windows. Eventually though the windows were in and the roll cage refitted complete with the new bolts to connect the top of the sides with the internal hoop. While the rear cage was off I also made some gaskets to go between the cage mounting plates and the body, cut from a large sheet of butyl rubber that used to line our pond.

First tests show that the windows don’t rattle and they seem to be water tight… so that’s a bonus !

Clearing the under seat box

Plan A - ECU and fuse box position behind driver's seat.

Plan A – ECU and fuse box position behind driver’s seat. A nice idea but no way the looms will reach.

Having quite a few days holiday left to book before April and intending to head up to the Muddy Truckers Trophy at the end of the month, I’ve booked quite a few days off this month with the intention of spending a lot of them working on the 90.

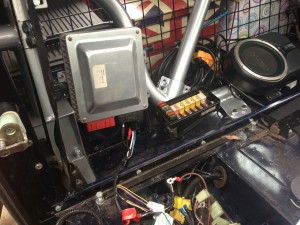
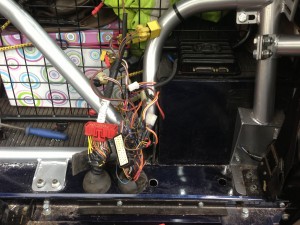
The first job on the list was to clear the underseat box where the engineECU, gearbox ECU and fuse box are located. There are a LOT of wires under there with the 2 big vehicle wiring looms and the gearbox loom.

The initial plan was to try and move everything behind the driver’s seat, if necessary extending the looms although, if possible, I wanted to avoid that. After disconnecting all the wiring and tracing it’s route it became increasingly clear that moving everything behind the driver’s seat would be a much bigger job than moving everything behind the passengers seat. The trouble was that I’d also mounted the aux fuse box and ARB compressor behind the passenger’s seat.

So, the plan got a lot more complicated as I ended up having to move the aux fuse box and ARB compressor to the driver’s side to make room for the engine ECU etc… The good news was that the route of the main and engine looms meant that both looms would be long enough to reach without modification/extending although a few wires would have to be extended such as the diff lock and high low switch wires but that’s no problem.

Plan B - Main two looms relocated behind passenger seat

Plan B – Main two looms relocated behind passenger seat – gearbox ECU on top of wheel arch.

Having checked the lengths of the looms and made sure I got them the correct way round, the first step was to drill the holes for the two looms to come through the floor having removed the aux fuse box and the ARB compressor. On mine this was limited by the length of the bulkhead loom so that was the important one to get right. Once that was in the engine loom hole went in alongside it.

I took the opportunity to tidy up the gearbox ECU wiring too, shortening the loom to length. When it had been mounted under the seat it didn’t really matter too much how much wire was floating about so I just used the whole loom as supplied with the ECU.

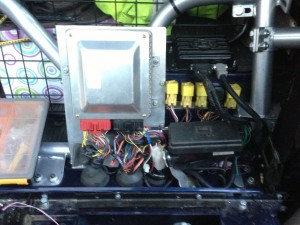
ECUs, relays and fuse box relocated.

ECUs, relays and fuse box relocated.

I made up a mounting bracket for the fuse box and cut up an old bulkhead fuse box plate to make a mounting plate for all the relays to mount onto on the front of the wheel arch. The final task was to make a mounting plate for the engine ECU to mount to. The intention is to make a cover that goes over the whole setup but that will probably have to wait for a while as it’s not a priority.

The good news is that, after this major surgery, the engine and gearbox and all connected circuits are working fine again so I can move onto the next job. Just need to get the aux fuse box, ARB compressor and subwoofer back in now and put the interior back together again !